4.28.2011

Ice Cream Fabric

Double Scoops
Spring is having a hard time making its way to my door, so I decided to draw some double-scoop ice cream cone fabric to make it seem more like summer.  I know it's a simple design, but I really like it.  It just worked out really well for me.  I think I am getting (a little bit) better with figuring out how to get patterns to look how I picture them. 

I still feel like I have a long way to go to get to where I'd like to be, but I do feel like I'm getting better with each design.  This may be one that I get as a test swatch. . .

4.26.2011

Chow Mein Bird Nests

Instead of dyeing eggs this year, even though I bought 18 eggs for just such an occasion, I made these cute little nests out of chow mein noodles and marshmallows.  Think rice crispy treats.  I used the mini-sized robin eggs to fill the nests.  I can't take all the credit, though.  I found the idea and the recipe at Bake at 350.  I made mine a bit smaller than hers, so I ended up with sixteen nests, each with three robin eggs.

Chow Mein Bird Nests
(adapted from Bake at 350)
3 c. mini marshmallows
3 T. butter
1/2 t. vanilla
1 package dry chow mein noodles (between 3 1/2 and 4 cups)
48 Mini robin's eggs, mini Cadbury eggs, or jellybeans

Melt marshmallows and butter in a saucepan over medium-low heat.  Once everything is melted and combined, stir in the vanilla, then remove from heat and stir in the noodles.  Line a cookie sheet or the counter with parchment paper.  Coat your hands with shortening before working with the noodles.  Grab a golf-ball sized bit of the mixture and form a nest by sticking your thumb in the middle of the ball and working your way around, keeping your thumb in the inside of the nest and using the rest of your hand to pinch from the outside.  Makes about 16 nests.  You may have to go back to some of the first nests you made and reform them slightly as the marshmallow cools.

I had my parents, in-laws, and brother over for Easter dinner, so I used these as place card holders.
They were super easy- just print the names on the right side of file folder labels and fold them over on themselves with a toothpick in the middle.  I know it's too late for Easter, but these would be cute for any spring dinner or bird-themed party.

4.22.2011

Laundry Room Before Photos


I have a hallway, laundry room, and weird coat closet that need some serious help.  Like, gross bland paint, entirely bare walls, no-decor-love-since-it-was-built help.  I'll just let the photos speak for themselves.  From my kitchen, enter the hallway to the garage.
Do you like how I threw a houndstooth rug down to try to make the hallway feel better about itself?  Okay, now go down the hall and turn right into the first door.  You have now entered the laundry room. 
That poor, poor light fixture.  So lonely and sad.  You can also see the only thing I have done to this room- the 3M hooks for the mops on the wall.  Those, and the blinds in the window.  Because, you know, I don't want any crazies peeking in the windows.
Okay, this photo is one of my faves: there's the lovely random-stuff shelf; the laundry detergent, dryer sheets, etc; and. . . the Easter basket pile!  Yes.  I have been storing all the stuff I have gotten over the last few weeks on the washer.  I need some storage.  Now here's the really great part about the laundry room.
The giant, blank, nine-foot wall.  It's hard to get a photo that really conveys the emptiness this wall makes me feel.  Also, my camera couldn't focus on it unless I did a side angle with some other stuff in the frame.  Yeah, it's that bad.
Lastly, we have the weirdest coat closet known to man.  Just look at it.  The door to the garage is on the left.  If I actually wanted to use the closet when I walked in the door, I would have to close the garage door and stand in the opposite corner of the hall (true story) in order to get the closet open.  Bad, bad planning.  It's very awkward.
Here's a view of the lovely interior.  And, yes, it is the paint storage closet.  I have wanted to just take the door off the hinges and be done with it on multiple occasions.

4.21.2011

Reclaimed Barnwood Jewelry Holder

My mom grew up on a farm as the youngest of nine.  When my grandma sold the eighty-acre farm to a developer, my family went up to Idaho to salvage what wood we could from the old whitewashed barn before everything was gone.  With that little bit of background, this piece is more than just a jewelry holder to me.  I'm so glad I have a piece of my family's history that also serves a purpose.
To make this old piece of wood into a large-capacity jewelry holder, I stapled a piece of wire fencing over the front to for earrings, then I screwed cup hooks for bracelets and necklaces along the sides and bottom.
I love the giant, rusty hinges and the little flecks of white paint here and there.  To hang this on the wall, I secured picture wire to the back and put two heavy-duty hooks on the wall.
Linked up:
Visit thecsiproject.com

4.19.2011

Feature: Ana White

 I recently discovered an awesome website that I thought might interest some of you: Ana White.  I can't believe it took me so long to find a site like this!  Ana makes homemade furniture and shares all the plans with us, for free.  She also tries to use simple tools that most of us already have.  I don't know about you, but as much as I'd love to have a wood shop, I don't have a table saw or any of the other woodworking tools I am used to building furniture with.  Even if you have never built furniture before, her plans are simple and easy to follow, with diagrams and detailed instructions.  Other builders can also make and submit plans, and there are some great ones on there!
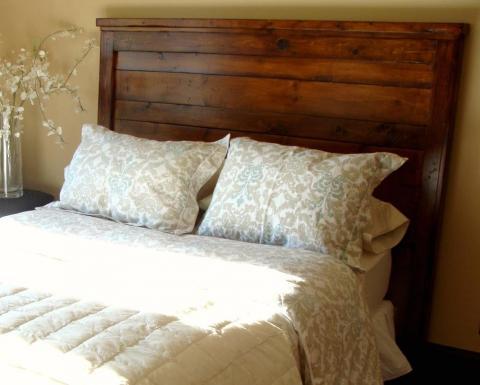
I am so excited to make a Farmhouse bed or a Reclaimed Wood headboard for our master bedroom.  Ana's plan catalog has hundreds of plans, all for under $200, and most for under $50.  I seriously cannot get over how awesome this website is!!  The possibilities are so super endless.  I have never considered making some of these bigger furniture pieces, but after shopping around for beds recently, it seems like a better idea to build something I love rather than settle for what's cheap in the store.

Some of my other favorites are:
I could go on.  Seriously, can you get over this awesomeness?  I submit that I cannot.  Look for some of these projects in the future!
P.S. I am in no way affiliated with or compensated by Ana White.  I truly just think she's awesome.

4.14.2011

Marshmallow Fondant and White Butter Cream Frosting

Last weekend I helped my friend Shauna make this rubber ducky cake for a boy baby shower.  It was my best one yet!  I didn't have any problems with the fondant cracking or anything.  The only thing I changed in my recipes was to make the butter cream frosting a little thinner, and to do a half batch of fondant.  The half batch was just so it would fit in my mixer better, and so I could do the different colors with the mixer, rather than by hand.

White Butter Cream Frosting
(adapted from Lion House Weddings)

2/3 cup plus 1 Tablespoon water
4 tablespoons meringue powder
12 cups powdered sugar
¾ tsp. salt
1 tsp. clear vanilla
1 tsp. almond flavoring
1 ¼ cups shortening

Combine water and meringue powder, whip at high speed till peaks form. Add 4 cups of the powdered sugar and beat on low speed until well incorporated. Add salt and flavorings; beat slightly. Alternately add shortening and remaining powdered sugar. Beat on low speed until smooth. Makes 7 1/2 cups frosting. (*I added more water at the end until the frosting was a smoother consistency.)

Marshmallow Fondant (Half Batch)
(I got this recipe from my aunt Sharon)

1/8 cup vegetable shortening (Crisco)
1/2 pound of white mini marshmallows (good quality)
1/2 tsp. clear vanilla flavor
1/2 tsp. butter flavor
1 tablespoon water
1 pound powdered sugar

Grease the inside of a large microwavable bowl with shortening. Be careful, the melted marshmallows can get very hot.

Put marshmallows, flavorings, and water into the bowl. Microwave on high for 60 seconds.  If marshmallows are completely melted, you’re ready to move on. If not, stir and return them back into the microwave for 30-second intervals—stirring after each—until the marshmallows are completely melted.

Put powdered sugar into a large mixing bowl. Fit stand mixer with dough hook. (If not using a stand mixer, use a wooden spoon).

Add melted marshmallow mixture to powdered sugar. This is where I also add any coloring that I want. (Hint: a half batch is the perfect size for covering a two-layer nine inch cake.)  Process at low speed until well incorporated, then turn speed up slightly and allow dough hook to “knead” mixture until sugar is fully blended into the liquid.
For the rubber ducky cake, we did one half-batch of leaf green (Wilton gel coloring) and one half-batch of sky blue.  Easy peasy!  This fondant recipe is the one used for my wedding cake, and it is my favorite.  The marshmallows make it actually taste like food.
Once the cake was frosted with buttercream, we covered the whole thing with a sheet of blue fondant, then added the green stripes and all the little bubbles.  The rubber ducky was a real one, so that made things easier.  All told, this cake took the two of us about three hours to make the frosting and fondant and decorate it.  Photos were taken by Shauna Spencer.

4.13.2011

Craft Room v2.0

Welcome to my basement craft room!  I decided to keep the color and just go with it, at least for now.  This corner is the drawing area, complete with a table and chairs for my little girls.  The fruit art is what I had in my kitchen before I painted it green and put up the dogwood tree.  I think this room is a definite improvement over my first craft room, which was turned into a nursery.  There is lots more room to work.
 The quilt is my mom's handiwork, so I'll have to give it back.  She let me borrow it for the interview, and it matches so well that I am thinking I will have to make my own to hang, although I am not much of a quilter.
This photo shows my screen printing machine, the walk-in closet (woot!), and my t-shirt bookcase with a thrifted rattan headboard and hook board made from barnwood.
Here's a close-up on the screen printer.  Yeah, we built it ourselves.
This is the view of the desks from the door.  My next thing to do in here is organize the closet, which I did not show today for the obvious reason that you don't need to see that kind of foolishness.  It's a mess.

4.12.2011

Interview with ABC4

Today I had an awesome opportunity to do an interview with Brent Hunsaker from ABC4 News in Utah.  I got to show how I do my screen printing and talk a little bit about Etsy.  I was pretty nervous, but I think it went really well.  It's always so interesting to meet people from the news in real life.  It almost seems like you already know them.  Weird.

Even though I do Etsy mostly as a hobby, it was nice to do be able to share a little bit of my creative side.  Plus, in the process of getting ready for the interview, I got my craft room set up!  The closet it still a mess, but I have a great creative work area. 

I also made a new screen design!  I am having some trouble with a new emulsion I am using, so I've blown out two screens trying to get it done.  A blown-out screen means that part of the stencil that I wanted to stay got washed off, which means I have to start completely over.  Once I get things worked out, I think you will be as excited as I am to see the new design.  Hint: It's a completely new type of product for me.

The Etsy story should air sometime in May, but the date isn't completely set yet.  My friends and neighbors Amie and Tanya will also featured.  What fun!
 

4.07.2011

Swatches

My swatches from Spoonflower are here!  I am especially excited about the color guide.  It's always such a pain to find the perfect color on your screen and then have it print all wrong

I am working on getting my basement craft room all set up this week.  I can't wait to get using it.  I am not sure if I will repaint it yet. . . It's a peachy color now, which I chose, but looking back I'm not sure it was the best choice.  I love green, but I also have so much green in my house already.

What is your ideal craft room color?

4.04.2011

Kitchen Curtains

The kitchen curtains are finished and hanging where they belong!  We did them the easy way, by using clip-on curtain rings, so we just had to make the rectangular panels to fit the windows.  For the curtain rods, I used three willow branches wrapped together with brown floral wire and hung them on the wall with brown cup hooks.  I had to buy brass cup hooks and spray paint them myself.  The tiebacks are from the brown curtains on this wall:
The kitchen bay is just to the left of these windows, so I used my leftover fabric to make these striped panels.  The bottom stripe is a solid green that matches the accents of the printed fabric, but that part is hiding behind the couch.  And yes, I still have some St. Patrick's Day decor up. 

As I mentioned before, the fabric is from the Cecilia line at IKEA, where they are selling off all of their remaining inventory.

I am so glad to have all these curtains done!  It really helps this giant room(kitchen, dining, living) feel more put together.  Next, I am going to paint the bay the same green as the kitchen and the other wall the same brown that I have used before.

I am planning to do a Summer Home Tour on the blog once I get everything in my basement arranged.  One of my biggest challenges will be figuring out how to photograph rooms with windows without getting the back-lit effect from the brightness outside.  Any ideas?