10.27.2011

Birch Trees Art

I finished painting these birch tree canvases for our master bathroom a couple of weeks ago.  It took a little bit longer than I expected, but the extra work was definitely worth the work to get the look I was going for.  Originally, I was going to do these two-toned, but it never looked quite right.  Once I changed the stripes on the trees to black, added slight shadows, and washed the grey with a slightly darker grey, things really looked better!  Here's a close-up:
I used a white paint in gloss and the other colors in matte to give another dimension to the pieces, but you'll have to wait to see that part of it until I finish up the rest of the master bathroom.  Since these are hung in our bathroom, I sprayed the canvases with two coats of matte artwork sealer to protect them from condensation and splashing water. 

Once we finish caulking the new trim, I will be able to get home tour photos of the master bathroom!  Also, the piano bench re-upholstery project and painting the hallway to the garage purple are finished, both with amazing results.  We also found some great Craftsman style knobs on clearance at Lowe's for our kitchen cabinets and installed them.  We had a very productive weekend last week, and I can't wait to show you all of our recently finished projects.

10.19.2011

Pumpkin Chocolate Chip Cookies

I was looking for some fall comfort food when my brother came to visit a couple of weeks ago.  I stumbled across this recipe on Pinterest and decided to give it a go, with a couple of twists.  The result was the best pumpkin chocolate chip cookies I've ever had! There are a lot of ingredients, but it is so worth it.

Pumpkin Chocolate Chip Cookies
(slightly adapted from Bow Peep Creations)
1 t. baking soda
1 t. milk
1 c. pumpkin puree
3/4 c. sugar
1/2 c. oil
1 egg
2 c. flour
2 t. baking powder
1 t. cinnamon
1 t. pumpkin pie spice
1/2 t. salt
1 c. chocolate chips
1/2 t. vanilla extract
1/2 t. almond extract

Dissolve baking soda into milk; set aside.  Combine pumpkin, sugar, oil, and egg until well combined.  Add flour, baking powder, cinnamon, pumpkin pie spice, salt, and baking soda mixture.  Stir well, then add chocolate chips, vanilla, and almond extract.

Bake on a greased cookie sheet at 375 degrees for 10-12 minutes.  Enjoy!

10.13.2011

Shark School Fabric Swatch

I have had this test swatch of my Shark School fabric for a while.  I decided I ought to finally share how it looks printed!  I really like how it turned out.  I think it would make great fabric for a little boy's quilt, a fun shower curtain for a kids' bathroom, or a cute beach tote.  You can purchase it here on Spoonflower.

I am ordering a retest of my Firework Show fabric, and first test of my Pretty Birds and Autumn Acorns fabrics, so I'll share those when they arrive.

10.12.2011

Wooden Candy Corn Hanger

This autumn, I decided to try something different for my front door.  And since my crafty friend Cami suggested that we make wooden candy corns, I thought it would be a perfect fit for new front-door decor.
We pretty much made it up as we went.  The tools we used that made it all possible were my husband's fancy miter saw and cordless drill, my orbital sander, and a pair of pliers/wire cutters, not to mention our paintbrushes and such.  For this project, we kept things simple and bought pre-primed 6" trim from Lowe's and just cut it to length.
The bottom piece is 12", the middle piece is 9", and the top piece is 6".  We cut each side on a 75 degree angle to meet up with the next piece(the measurement we used on the miter saw said 15 degrees, but it makes more sense to me to say it the other way).  Then we drilled the holes for the wire and sanded all our edges.  We used plain old acrylic craft paint to paint each piece.  The colors ended up pretty bright, so I rubbed a little bit of stain over the top of the paint after the paint was dry to tone the colors down.  Next, I wired all the pieces together, added some felt furniture pads to the back to keep it from scratching the door, and finally hung it up!  We were able to pretty much finish this project up in a day.
Linked up: The CSI Project, Tatertots & Jello

EDIT:  I made the top 10 in Krylon's painted Halloween projects challenge!

10.06.2011

Simple Hairbow Tutorial

It's here!  The Simple Hairbow Tutorial, with printable templates!  I hope you're as excited as I am about this.

Here's what you'll want to have on hand to make this project go quickly.
-Ribbon
-Glue gun
-Needle and thread
-Candle for singeing ribbon ends
-Scissors
-Hair clips (I got mine at a beauty supply store in bulk)
-Hairbow template
Just click on the image, print without scaling, and cut your templates out.  You can either print it on cardstock; or print on normal paper, cut the templates out, trace them onto cardboard (I used a cereal box for mine) and cut that out.  It's fun to experiment with the different template sizes and different ribbon sizes.

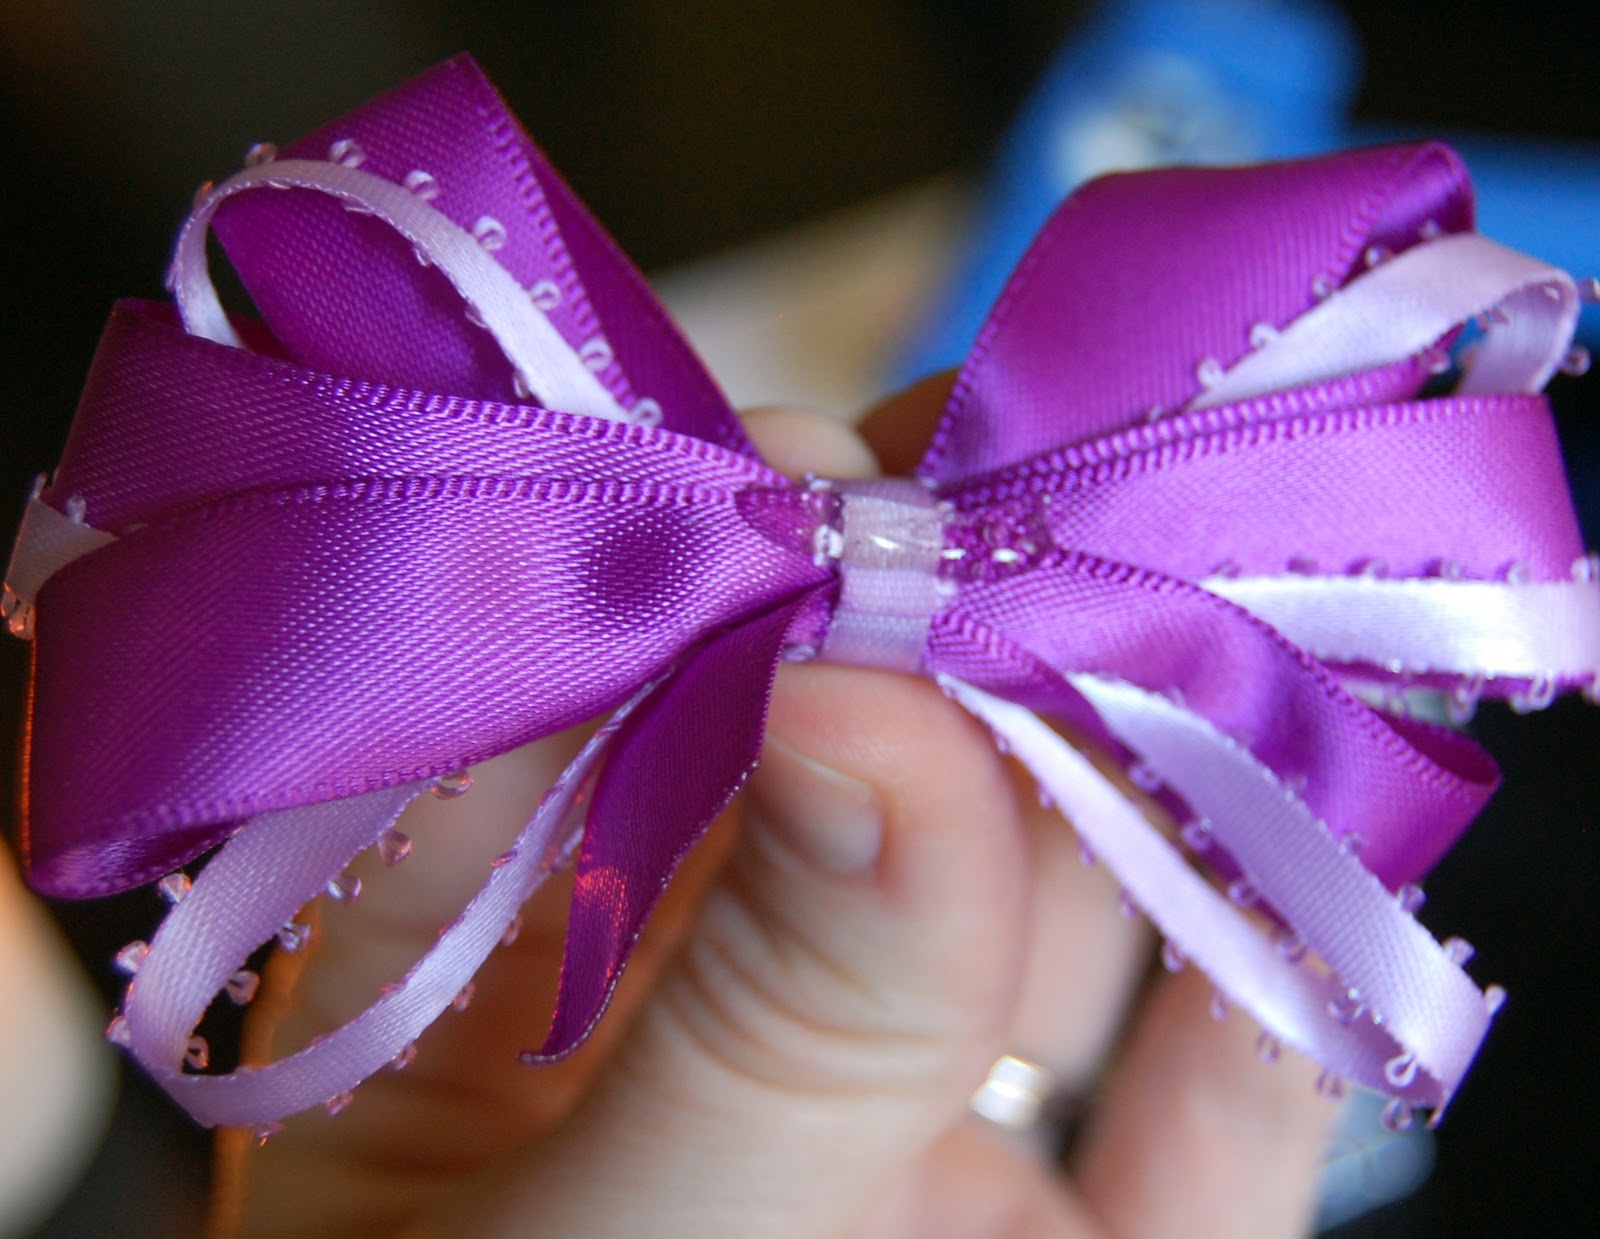
Okay, let's get started.  Begin by wrapping your ribbon around the template, securing the end with a clip.
Wrap around the template in a spiral, keeping the ribbon close but not overlapping.  Go around one more time than loops you want the bow to have.  So, if you want three loops on each side, wrap four times.  You will end on the opposite side that you started on.
Cut your ribbon and secure the other end with another clip.
Now you will begin sewing.  Don't worry, it's not too complicated, and it's not even going to show.  Do your best to stay in the middle, so your loops will be evenly spaced.
I like to go through the middle of the ribbon on each side.
At this point, you are done with the template, so remove the clips and slide the ribbon off the end.
Slowly cinch up the ribbon on the thread, being careful to not let your knot slip through.  Bunch the ribbon up how you want the bow to look.
Once you are happy with how everything looks, wrap the thread around the bow, sew through all the layers a couple of times, and tie your thread off.
Trim the ends of your ribbon a little bit, maybe at a fancy angle, then light that candle and singe the ends so they won't fray.
I'm all about the fancy angle.  Now we need to hide that thread!  Take another piece of ribbon and hot glue it to the back of the bow.
Wrap the ribbon all the way around, cut it off, and glue the other end down.
Bow, done.  Now for the clip.  I like to cover my clips in ribbon, at least on the top.  This gives you somewhere to glue the bow without gluing the clip together.
Once your clip is covered in ribbon, just dab some glue onto the back of the bow.
Don't do too much, or else it will spill out the sides and look crappy.  And nobody wants crappy bows.
Woo!  Look at those lovely things.  Now find yourself a head of hair to stick 'em on.
Linked up: Tatertots and Jello