I have been getting into sewing clothes for my girls lately. These deer leggings were one of my first kids patterns that I did for all three girls. I used fabric from Girl Charlee and the Lollipop Leggings pattern from Peek-A-Boo Pattern Shop. The deer fabric was not the ideal fabric for leggings, since it didn't have any stretch to it, but the print was too cute, so I had to use it anyway. They have held up pretty well, and kids grow so fast that they will grow out of them before they wear out. The fit on the pattern was great, and they were way easier than I expected. Definitely a great beginner pattern!
Showing posts with label kids. Show all posts
4.27.2014
A-deer-able Leggings
I have been getting into sewing clothes for my girls lately. These deer leggings were one of my first kids patterns that I did for all three girls. I used fabric from Girl Charlee and the Lollipop Leggings pattern from Peek-A-Boo Pattern Shop. The deer fabric was not the ideal fabric for leggings, since it didn't have any stretch to it, but the print was too cute, so I had to use it anyway. They have held up pretty well, and kids grow so fast that they will grow out of them before they wear out. The fit on the pattern was great, and they were way easier than I expected. Definitely a great beginner pattern!
9.22.2013
Poppy Dress
I got to do a quick pattern test for Melissa of Sew Like My Mom this weekend. I tried out her upcoming Poppy Dress for my oldest girl, and I love how it turned out! I did the short sleeve dress option, but there is also a sleeveless, 3/4 sleeve, and full sleeve option. There are also pockets on each side, and an option to do this as a shirt instead of a dress. Talk about versatile!
I also made my own bias tape for the first time for this project, which is part of the pattern. Not hard at all. I have never had a reason to do it, but it was so worth it for this dress. With two more little girls in our family, I see myself making this at least a couple more times.
3.08.2013
Fabric Pom Pom Headbands
I made some of these fabric pom pom headbands in anticipation of the newest member of our family-- our third baby girl! Her big sister was slightly willing to model them for me, since we haven't met our little bundle yet. We are not hurting for girly stuff around here, but it's always fun to make something new. This project is great for using fabric scraps, and these didn't take too long using this tutorial from Little Miss Momma.
I got the fancy elastic a while ago from Pick Your Plum, and it's perfect for these headbands. After googling headband sizes, I varied all the lengths between 12" and 15" for newborn head sizes and up. Obviously some of them are big enough for a two-year-old, but I also made a couple of smaller baby sizes.
Can't wait to meet our little girl!
I got the fancy elastic a while ago from Pick Your Plum, and it's perfect for these headbands. After googling headband sizes, I varied all the lengths between 12" and 15" for newborn head sizes and up. Obviously some of them are big enough for a two-year-old, but I also made a couple of smaller baby sizes.
Can't wait to meet our little girl!
2.27.2013
My Little Pony Birthday Cake
My Little Pony was the requested theme for my daughter's 4th birthday party. I made a three-layer 9" round cake in rainbow colors. Sadly, I wasn't able to get a photo of the inside, but it was super bright and vibrant.
I got my kid-at-heart husband a cotton candy machine for Christmas, so he whipped up the blue cotton candy for the clouds. I thought it turned out as a really cool touch. I'll admit that I had much grander plans for this cake, but after a party with a dozen friends, I just wasn't up for it. The rainbow ended up laying on the cake instead of standing up, and the pony was just a toy.
Even though I wasn't able to do all the things with this cake that I had planned, it was still a huge hit with the kids and really tasty!
I got my kid-at-heart husband a cotton candy machine for Christmas, so he whipped up the blue cotton candy for the clouds. I thought it turned out as a really cool touch. I'll admit that I had much grander plans for this cake, but after a party with a dozen friends, I just wasn't up for it. The rainbow ended up laying on the cake instead of standing up, and the pony was just a toy.
Even though I wasn't able to do all the things with this cake that I had planned, it was still a huge hit with the kids and really tasty!
11.07.2012
Unicorn Pegasus Cake
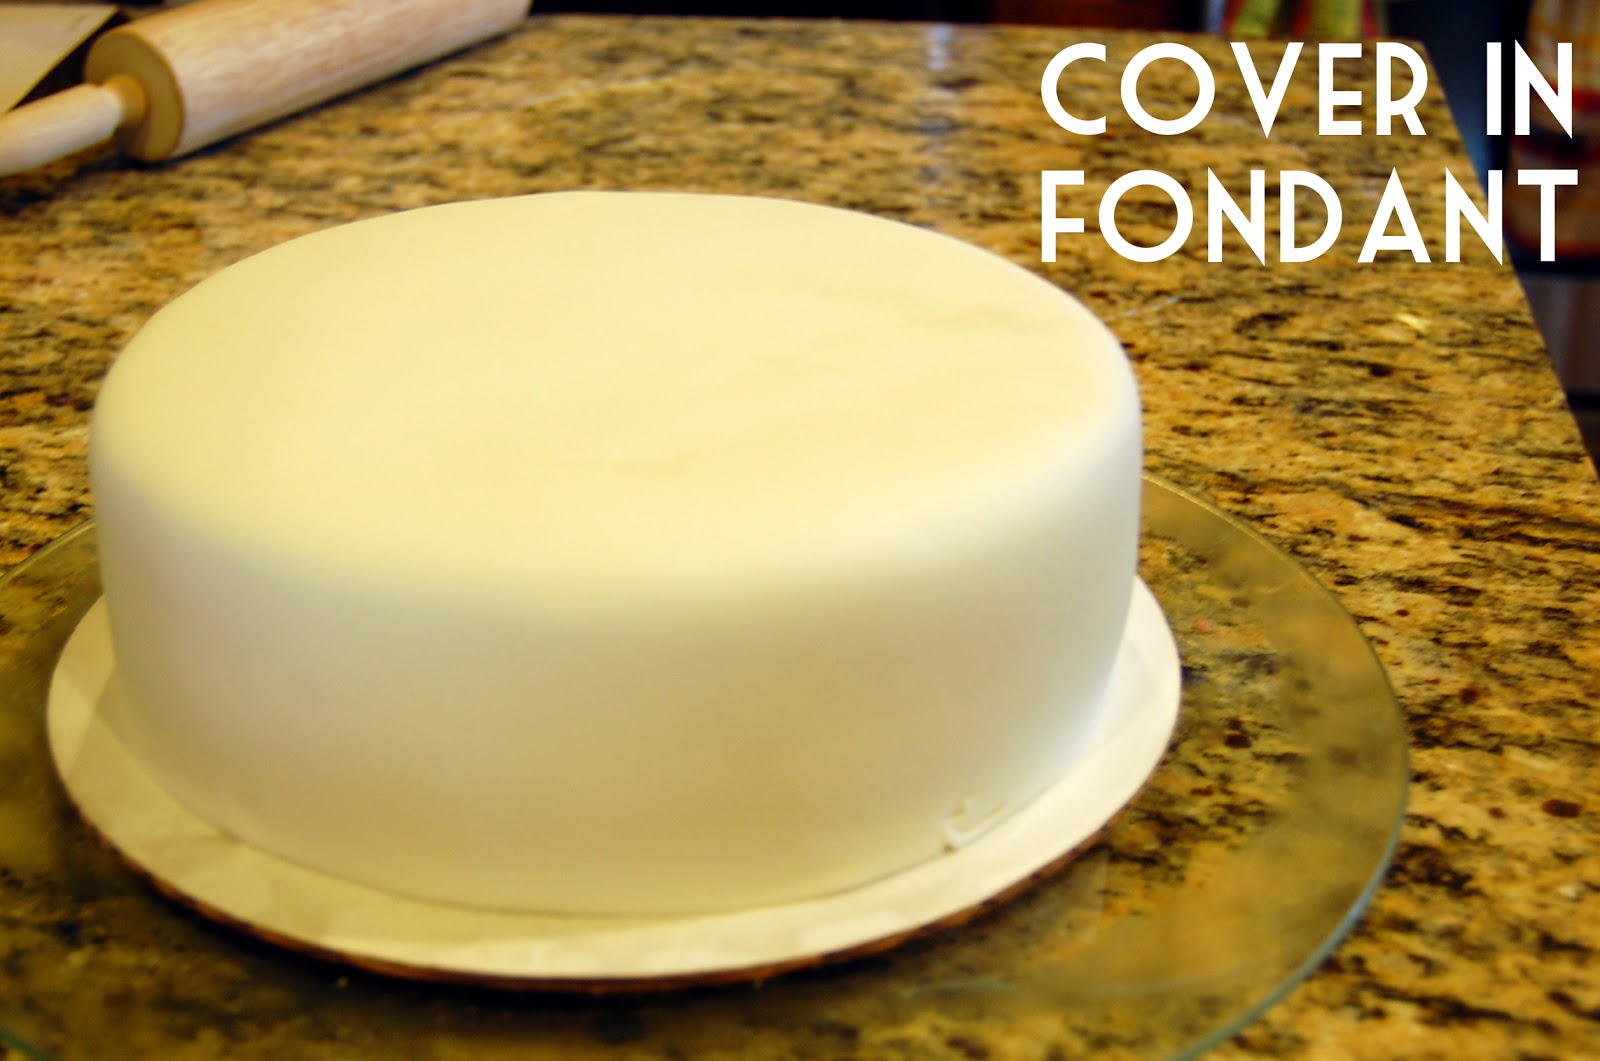
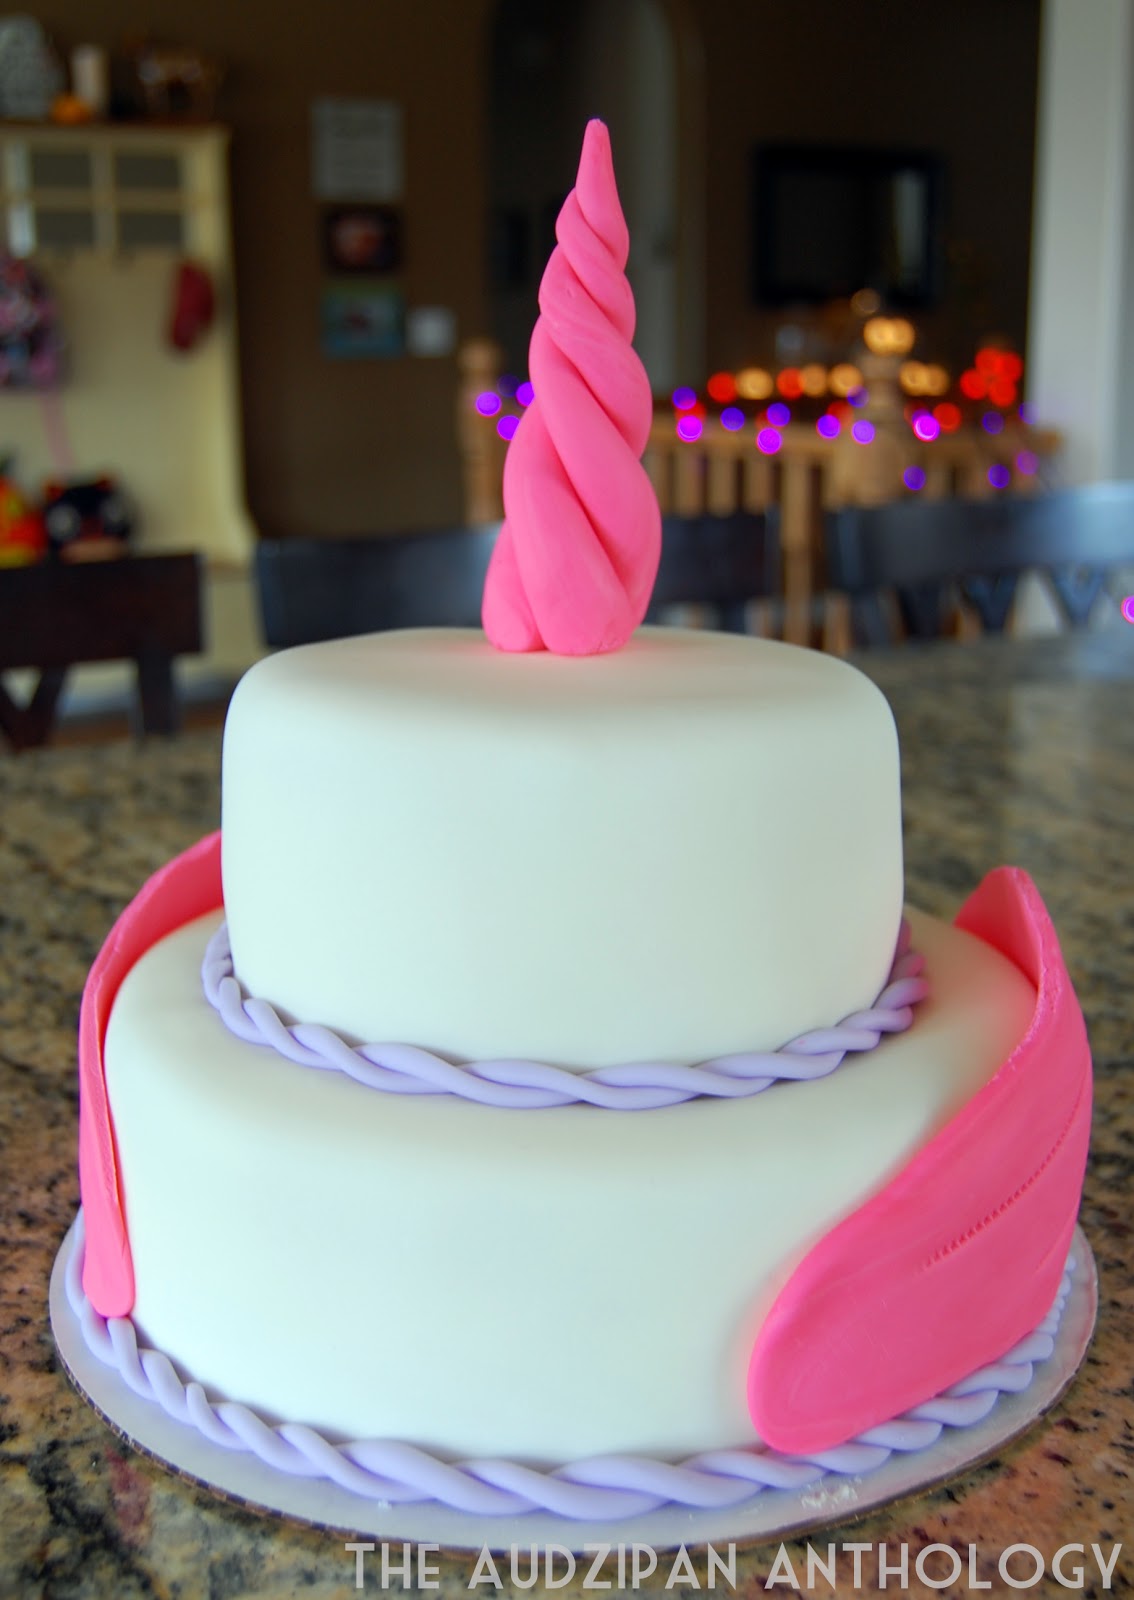
I made this fun birthday cake for my niece a couple of weeks ago, and I have to say, it does get easier with each new cake. I loved that the party theme was Unicorn Pegasus. What could be better for a six-year-old little girl? Here's a brief run-down of the process.
I love how two 6" rounds look stacked on two 9" rounds. The proportions seem perfect to me.
Before I stacked the top tier, I put a few bamboo skewers in the bottom for support.
The top tier is on a cardboard cake board, which sat on the bamboo skewers and worked really well.
I stuck a skewer through the top in the center, then instead of cutting it off, I wrapped the pink fondant around it for the unicorn horn.
I thought about doing more embellishments but ended up liking the simple look the best. I usually do. We have another birthday next week, but I don't have a plan for the cake yet. It may or may not involve fondant. I haven't even sent out invitations, so it's probably going to be a low-key occasion. Either way, I'm sure it will be a good time!
I love how two 6" rounds look stacked on two 9" rounds. The proportions seem perfect to me.
Before I stacked the top tier, I put a few bamboo skewers in the bottom for support.
The top tier is on a cardboard cake board, which sat on the bamboo skewers and worked really well.
I stuck a skewer through the top in the center, then instead of cutting it off, I wrapped the pink fondant around it for the unicorn horn.
I thought about doing more embellishments but ended up liking the simple look the best. I usually do. We have another birthday next week, but I don't have a plan for the cake yet. It may or may not involve fondant. I haven't even sent out invitations, so it's probably going to be a low-key occasion. Either way, I'm sure it will be a good time!
10.20.2012
DIY Spidergirl Costume
My oldest daughter decided that she wanted to be Spiderman for Halloween a long time ago, like months. For a three-year-old, that is a very long time. Luckily, she hasn't changed her mind about it either. I don't know why she is so into Spiderman, except for maybe some fatherly influences, but she is, and so we are going with it.
We tried on a cousin's old costume with built-in muscles, and it just looked weird on a little girl with long, blonde hair. Then, I saw this on Pinterest:
Problem solved! Just add a tutu to a boy costume and you're set. (I don't know the original source of this photo, because the link is broken on my pin.) This week, I found a muscle-less Spiderman costume at Target for $10, and work on the tutu began.
I used an elastic waist and made the elastic band 4" shorter than my daughter's waist. Even then, it ended up slightly looser than I wanted, but it still fits well enough. The tulle was cut in 15" strips, so it ends up around 7" sticking out. Here's a full-length "in character" shot:
I don't know where she gets it. We still need some accessories, like maybe a felt eye mask and some cute hair things. I have some leftover red tulle, so I could even just tie that around pigtails or something.
And no, the pink flip flops aren't part of the costume. It's way too cold around here for that. Once I finish the felt eye mask, it's going to be a very happy Halloween around here for this little girl!
We tried on a cousin's old costume with built-in muscles, and it just looked weird on a little girl with long, blonde hair. Then, I saw this on Pinterest:
Problem solved! Just add a tutu to a boy costume and you're set. (I don't know the original source of this photo, because the link is broken on my pin.) This week, I found a muscle-less Spiderman costume at Target for $10, and work on the tutu began.
I used an elastic waist and made the elastic band 4" shorter than my daughter's waist. Even then, it ended up slightly looser than I wanted, but it still fits well enough. The tulle was cut in 15" strips, so it ends up around 7" sticking out. Here's a full-length "in character" shot:
I don't know where she gets it. We still need some accessories, like maybe a felt eye mask and some cute hair things. I have some leftover red tulle, so I could even just tie that around pigtails or something.
And no, the pink flip flops aren't part of the costume. It's way too cold around here for that. Once I finish the felt eye mask, it's going to be a very happy Halloween around here for this little girl!
5.17.2012
DIY Backyard Playset (Phase One)
Things have been kinda quiet around the blog for the last couple of weeks, mostly because I have been helping my daughter rehabilitate her leg after she got her leg cast off. She didn't want to use her leg for the first week and then some, and I spent a lot of time trying to get her moving again.
We had wanted to get our kids a backyard playset this year, but after looking around at a lot of different stores and websites, we didn't think our budget could take it. We decided that to get what we wanted for the price we wanted, we would have to design and build our own playset with lumber we could readily get from the store. This is called "phase one" because we'd like to add more towers and swings and things like that as our kids get older.
My husband, of our DIY pergola and toddler picnic table fame, had this thing planned and built in a couple of weeks of working on it here and there. He's amazing! We used paving stones underneath the support posts to make everything level and stable. The picnic table fits under there perfectly, and now the kids always have a spot of shade. From on the platform, there's a great view of the neighborhood and a prime place to blow bubbles.
Next thing on our list: finishing our basement family room. It's going to be a bit of work to get what we want done down there, but after doing the two bedrooms and bathroom, I think we are up for the challenge. Of course, I will keep doing my little projects here and there. I'm hoping to share a couple of those next week, then it's off to Colorado for my family vacation and 10K!
Linked up: Tatertots & Jello
We had wanted to get our kids a backyard playset this year, but after looking around at a lot of different stores and websites, we didn't think our budget could take it. We decided that to get what we wanted for the price we wanted, we would have to design and build our own playset with lumber we could readily get from the store. This is called "phase one" because we'd like to add more towers and swings and things like that as our kids get older.
My husband, of our DIY pergola and toddler picnic table fame, had this thing planned and built in a couple of weeks of working on it here and there. He's amazing! We used paving stones underneath the support posts to make everything level and stable. The picnic table fits under there perfectly, and now the kids always have a spot of shade. From on the platform, there's a great view of the neighborhood and a prime place to blow bubbles.
Next thing on our list: finishing our basement family room. It's going to be a bit of work to get what we want done down there, but after doing the two bedrooms and bathroom, I think we are up for the challenge. Of course, I will keep doing my little projects here and there. I'm hoping to share a couple of those next week, then it's off to Colorado for my family vacation and 10K!
Linked up: Tatertots & Jello
3.19.2012
Chillin' with My Peeps Stenciled Shirts
I was in the middle of about four other projects, when I had this idea for Easter shirts for my girls this year. I am someone who is easily suckered by seasonal items at the store. Before, it was mostly candy and decor, but now that I have kids my little love of all things holiday reaches into clothing as well. This year for Easter, I wanted to make dresses for the girls (which are almost done!), and I got to thinking about other kinds of holiday-themed clothing, which is when I had the idea for these shirts.
Admittedly, the idea wasn't entirely my own. I first saw it as a wood craft, but thought the concept could easily be really cute for Easter shirts. Plus, I was able to use things I already had on-hand, so I didn't have to spend a penny on these.
My method was the same I have used on my stenciled shirts in the past, using vinyl cut on my Silhouette as a stencil. It works pretty well, although I'd love to try their stencil vinyl or freezer paper. I tried cutting freezer paper on my Silhouette a year or two ago, and it didn't work at all, but now that I have new mats(yes!) I am thinking it might work after all.
After I designed the graphics and cut the vinyl, I put the vinyl on each shirt and used my fabric ink and brushes to paint the shirts. I had to do three coats of the white, which was a little bit ridiculous. Once I was done painting in the stencil, and I pulled off the vinyl and let the paint dry. For the eyes and noses, I dipped the other end of my brush in brown fabric paint and dabbed it on. To make sure the ink was cured, I baked each shirt in the oven for one minute at 350 degrees. This was mostly for the silver paint, since it doesn't cure just by air drying.
If you'd like the Silhouette .studio cut file for these shirts, just leave a comment with your email or send an email to audzipan at gmail.
Linked: Craft-O-Maniac, Skip to My Lou, Sugarbee Crafts, Shwin&Shwin, Tatertots & Jello
Admittedly, the idea wasn't entirely my own. I first saw it as a wood craft, but thought the concept could easily be really cute for Easter shirts. Plus, I was able to use things I already had on-hand, so I didn't have to spend a penny on these.
My method was the same I have used on my stenciled shirts in the past, using vinyl cut on my Silhouette as a stencil. It works pretty well, although I'd love to try their stencil vinyl or freezer paper. I tried cutting freezer paper on my Silhouette a year or two ago, and it didn't work at all, but now that I have new mats(yes!) I am thinking it might work after all.
After I designed the graphics and cut the vinyl, I put the vinyl on each shirt and used my fabric ink and brushes to paint the shirts. I had to do three coats of the white, which was a little bit ridiculous. Once I was done painting in the stencil, and I pulled off the vinyl and let the paint dry. For the eyes and noses, I dipped the other end of my brush in brown fabric paint and dabbed it on. To make sure the ink was cured, I baked each shirt in the oven for one minute at 350 degrees. This was mostly for the silver paint, since it doesn't cure just by air drying.
Linked: Craft-O-Maniac, Skip to My Lou, Sugarbee Crafts, Shwin&Shwin, Tatertots & Jello
1.03.2012
Play Kitchen Redo
Anybody recognize this? I posted the before photo of this play kitchen way back last summer. I put off redoing it for a while, because I knew that it would be a bit of work and I wasn't sure what I wanted to do with it yet. About a month before Christmas, I decided that it would make a great gift for my young daughters, along with some play kitchen accessories. I had some leftover paint from the green stripes in my daughter's bird bedroom, my mother-in-law gave us the neato spoon and rolling pin drawer pulls, and my parents provided the metal bowl "sink", copper "faucet", and other knobs. I already had all the supplies for the vinyl burners and utensil decals. The only money we spent was on the toys to go along!
Once again, this is what I started with:
It was really in pretty good shape, just a little boring. The drawers and some of the doors were stuck together, and one of the handles was missing. Also, I don't know if you noticed, but the handles on the top doors were installed on the top instead of the bottom.
My brother helped me install the sink, which is a metal bowl that we set in the counter top and secured with screws. I painted the whole thing with an angle brush and a mini roller, which gave it a really nice finish. We only had five of the cool drawer pulls, so we had to find a sort-of matching pull at Lowe's. I used my Silhouette to cut out the purple vinyl decals. I just did a bunch of circles for the the burners and found an image online for the kitchen utensils. I also did an "H" and "C" for the knobs by the faucet.
I really love how this turned out! Both of my daughters (1 and almost 3) love playing with it. The kitchen toy sets from IKEA fit perfectly, plus they got some other fun kitchen toys from our families.
Once again, this is what I started with:
It was really in pretty good shape, just a little boring. The drawers and some of the doors were stuck together, and one of the handles was missing. Also, I don't know if you noticed, but the handles on the top doors were installed on the top instead of the bottom.
My brother helped me install the sink, which is a metal bowl that we set in the counter top and secured with screws. I painted the whole thing with an angle brush and a mini roller, which gave it a really nice finish. We only had five of the cool drawer pulls, so we had to find a sort-of matching pull at Lowe's. I used my Silhouette to cut out the purple vinyl decals. I just did a bunch of circles for the the burners and found an image online for the kitchen utensils. I also did an "H" and "C" for the knobs by the faucet.
I really love how this turned out! Both of my daughters (1 and almost 3) love playing with it. The kitchen toy sets from IKEA fit perfectly, plus they got some other fun kitchen toys from our families.
Thanks to everyone who helped get this together in time for Christmas-- my brother Clark, parents on both sides, and mostly my awesome husband Chris. I've got him working on an Ana White headboard now. It just needs some stain and clear coat, then we'll be ready to install! Also, I am working on a new look for the blog for the new year. Check out the watermark on the photos in this post for a little preview.
Linked: Tatertots & Jello
12.31.2011
Playroom and Guest Room
We're wrapping up the home tour with our biggest basement room (so far). This bedroom is quite large, about 15 feet square. Since it's so big, it does double duty as the playroom and the guest room. We've got a full size bed in there, and entertainment center, and a bunch of toys. I hope to someday have a television in there, but we don't have one now. I also want to do some decor, optimize the storage, and maybe do some sort of headboard for the bed.
This room is sort of the catch-all for our cast-off furniture as well. I made the nightstand and cedar chest in high school woodshop, and the brown upholstered chair was a summer project of mine around the same time. My carpenter brother made the entertainment center, which is super heavy and very well done.
The chalkboard is one of the favorite toys in the playroom. It's accompanied by my first (and one of very few) oil paintings.
That's it! In the top photo, you can see a sneak peek of the play kitchen I just redid for my daughters for Christmas, but that will have its own post next week. I hope you've enjoyed this home tour!
Next year, I hope to be able to show the laundry room and our basement family room that is still unfinished, since they didn't make it into this tour. The laundry will require some built-in shelving, and the basement family room is a huge project, as it is very large and we want to include a fireplace and a small kitchen area. We've got some big ideas for the future!
This room is sort of the catch-all for our cast-off furniture as well. I made the nightstand and cedar chest in high school woodshop, and the brown upholstered chair was a summer project of mine around the same time. My carpenter brother made the entertainment center, which is super heavy and very well done.
The chalkboard is one of the favorite toys in the playroom. It's accompanied by my first (and one of very few) oil paintings.
That's it! In the top photo, you can see a sneak peek of the play kitchen I just redid for my daughters for Christmas, but that will have its own post next week. I hope you've enjoyed this home tour!
Next year, I hope to be able to show the laundry room and our basement family room that is still unfinished, since they didn't make it into this tour. The laundry will require some built-in shelving, and the basement family room is a huge project, as it is very large and we want to include a fireplace and a small kitchen area. We've got some big ideas for the future!
Labels:
guest room,
home tour,
kids,
playroom
12.28.2011
Kids' Bathroom
I have been realizing recently that I have a few more rooms to post if I want to finish this home tour while it's still 2011. There are really only three more rooms worth seeing, one of which is the upstairs kids' bathroom. With this and the last two rooms, the quality of interior design is a bit lacking, I know. Unfortunately, my resources are a bit limited, so I just do what I can when I can. Besides, if my house were all decorated how I want, what would I do with myself in my "spare time"?
That being said, this bathroom is still pretty cute for not getting much attention. I got the jungle decor from my mom when she redid her bathroom, I made the hair clip tree, and the rest has been randomly acquired.
I will admit that I don't really have a clear vision for this bathroom. I haven't given it too much thought, but I would like to personalize it a bit more this next year. I do know that I want to customize the builder-grade mirror, with a frame of wood or tile. I might want to try a stencil or design on the walls, or horizontal stripes. We are also going to need even more hair clip storage. With two girls, we've got bows everywhere!
Look for the playroom and downstairs bathroom stops on the tour before this week is over!
Subscribe to:
Posts (Atom)