Showing posts with label fondant. Show all posts

4.16.2014

Zebra Cake with a Cherry on Top

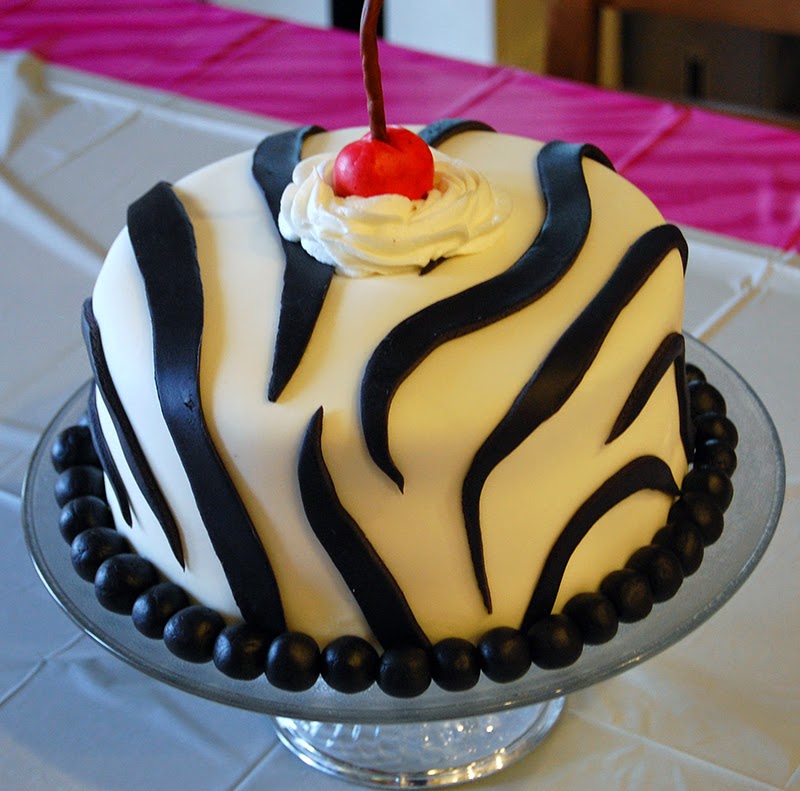
My oldest girl recently turned 5, and she specifically requested this cake for her big day, a zebra striped cake with a cherry on top.  I loved how it turned out!  She always has the best ideas for cakes.  I threw in a fun little surprise for the inside, too.
Zebra stripes inside!  It was so easy to do.  While I was filling the cake pans with batter, I just alternated between vanilla and chocolate batter, pouring into the center of the pan each time.  The original circle of batter was eventually pushed to the outside and the zebra stripes were done.
For the cherry on top, I just molded the cherry and stem out of leftover fondant.  I put a toothpick inside the lower half of the stem, then stuck it in the cherry after it had hardened enough to hold its shape.  We had a great time with the zebra theme.  It is also surprisingly easy to find zebra striped party supplies when you are looking for them!


2.27.2013

My Little Pony Birthday Cake

My Little Pony was the requested theme for my daughter's 4th birthday party.  I made a three-layer 9" round cake in rainbow colors.  Sadly, I wasn't able to get a photo of the inside, but it was super bright and vibrant. 
I got my kid-at-heart husband a cotton candy machine for Christmas, so he whipped up the blue cotton candy for the clouds.  I thought it turned out as a really cool touch.  I'll admit that I had much grander plans for this cake, but after a party with a dozen friends, I just wasn't up for it.  The rainbow ended up laying on the cake instead of standing up, and the pony was just a toy. 
Even though I wasn't able to do all the things with this cake that I had planned, it was still a huge hit with the kids and really tasty!

11.07.2012

Unicorn Pegasus Cake

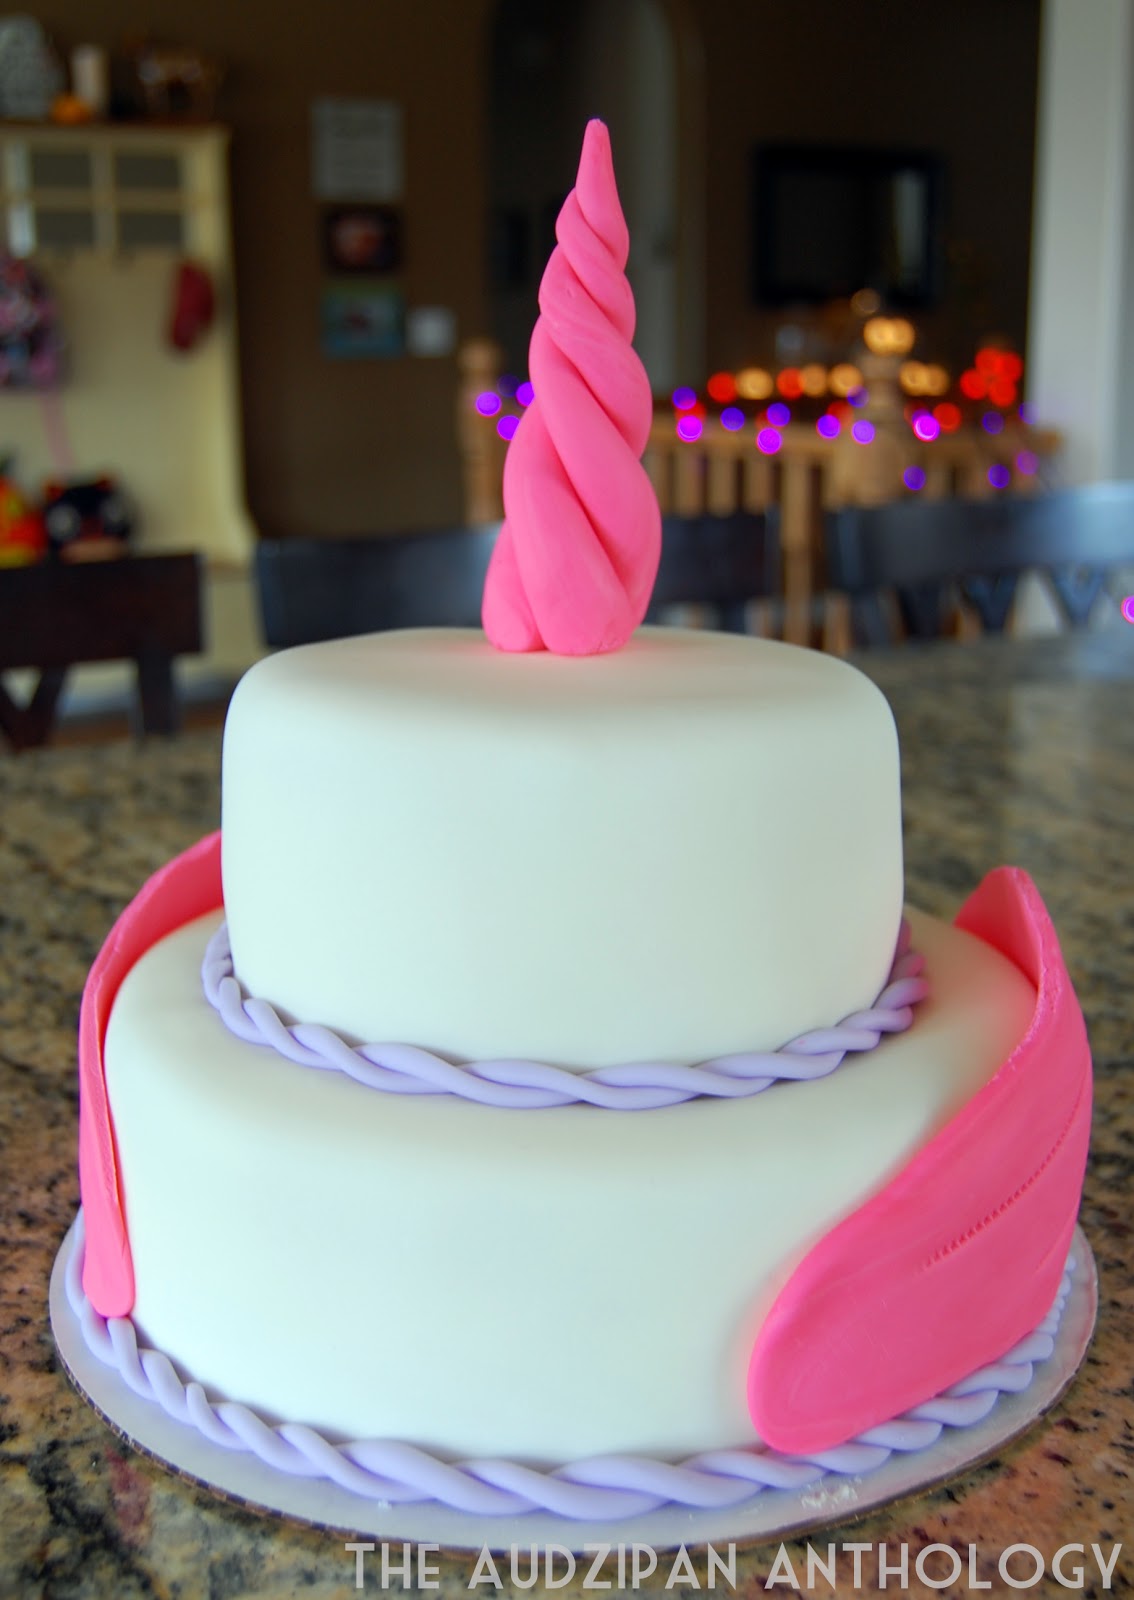
I made this fun birthday cake for my niece a couple of weeks ago, and I have to say, it does get easier with each new cake.  I loved that the party theme was Unicorn Pegasus.  What could be better for a six-year-old little girl?  Here's a brief run-down of the process.
I love how two 6" rounds look stacked on two 9" rounds.  The proportions seem perfect to me.
Before I stacked the top tier, I put a few bamboo skewers in the bottom for support.
The top tier is on a cardboard cake board, which sat on the bamboo skewers and worked really well.
I stuck a skewer through the top in the center, then instead of cutting it off, I wrapped the pink fondant around it for the unicorn horn.  
I thought about doing more embellishments but ended up liking the simple look the best.  I usually do.  We have another birthday next week, but I don't have a plan for the cake yet.  It may or may not involve fondant.  I haven't even sent out invitations, so it's probably going to be a low-key occasion.  Either way, I'm sure it will be a good time!

7.07.2012

Unbirthday Cakes

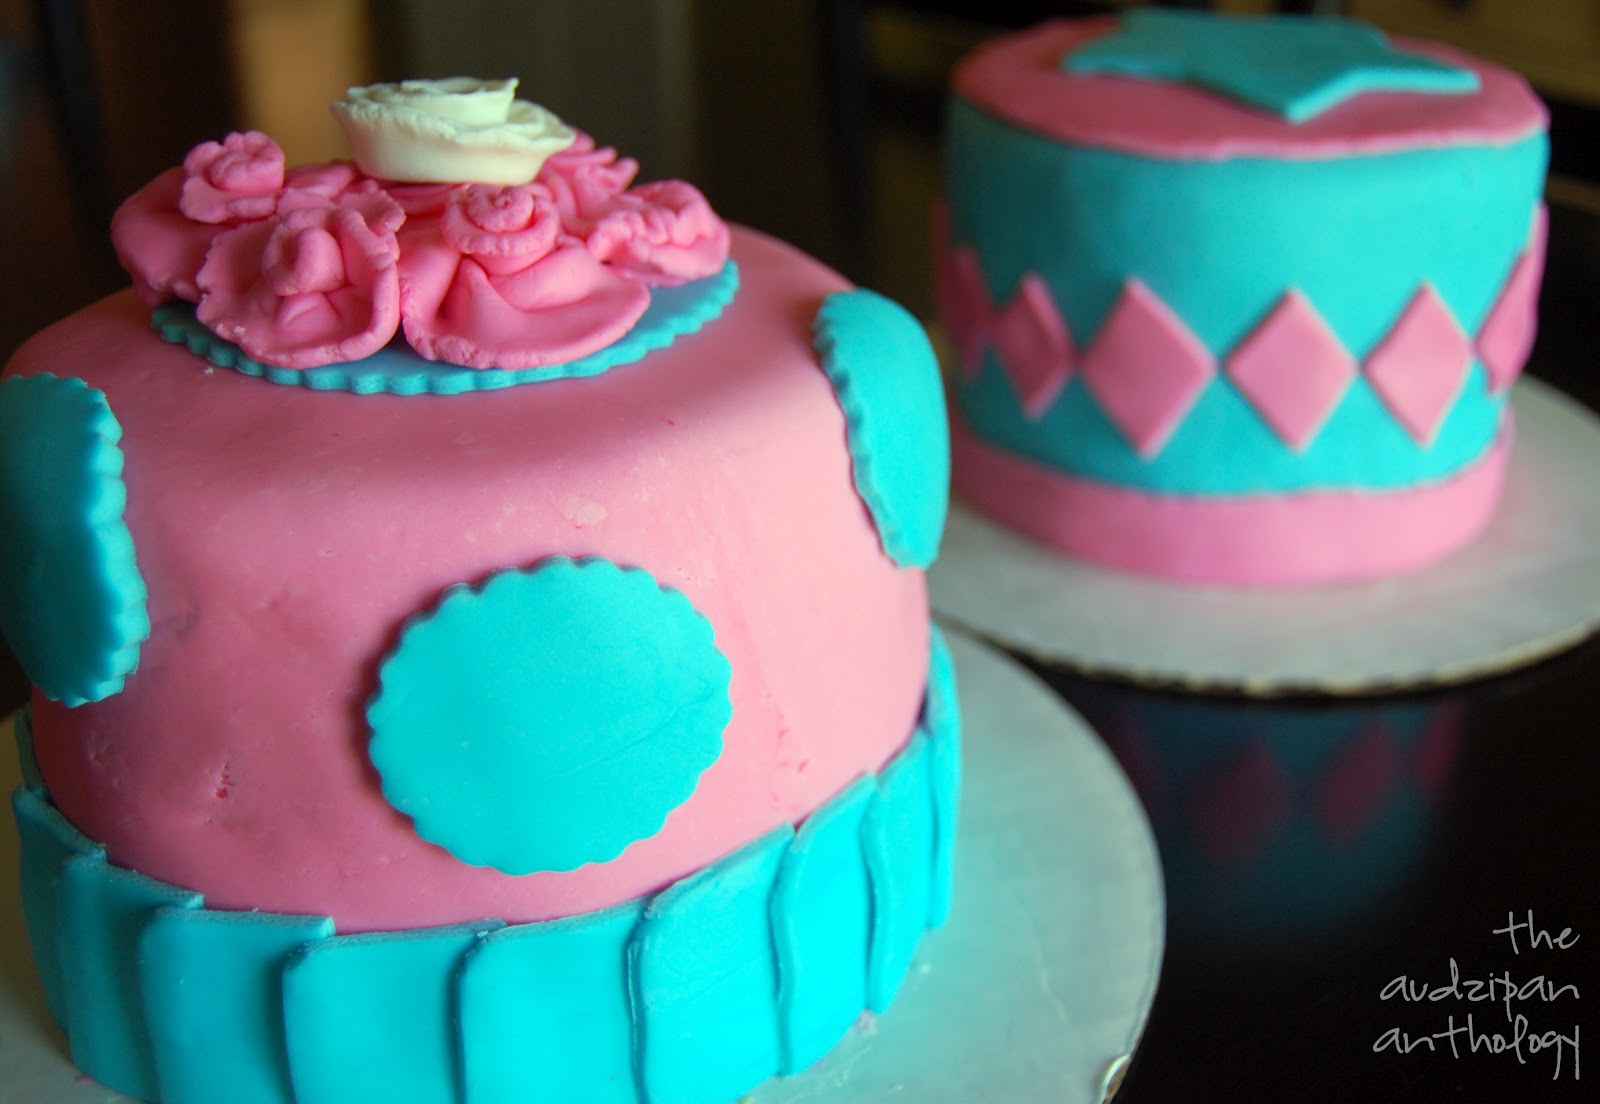
Last month, we had an Unbirthday Party for my mom's Domestic Science Club meeting.  I made the cakes for the party, and once again learned a lot about the process.  I chose sky blue and rose pink for the colors.  One of the cakes was butter yellow, and the other was chocolate fudge.  I did them in 6" round pans, which was a fun shape and size. 
The biggest lesson learned during this session: don't finish fully-frozen cakes!  I like to freeze my cakes to make it easier to work with them, but since these ones were thicker than usual they didn't defrost as quickly as 9" rounds.  This means that I ended up with shrunken cakes the next day.  Luckily, I had only covered them with a single layer of fondant since I hadn't had time to do the decoration, so I was able to salvage these ones.
The flowers were just strips of fondant, rolled and shaped along the way.  I find that I always have less time for doing the finishing touches than I'd like.  Maybe next time I will remember that and plan ahead!  The white flower was my first attempt at working with gum paste, which was not at all what I expected.  I have some more experimenting and research to do on that front.

2.15.2012

Yellow and Green Bird Birthday Cake

My oldest gal turned three last week, and when I asked her what she wanted for her party, she said a green bird cake and yellow balloons.  I had been wanting to try a tiered cake, so I figured this was the perfect time.  It was a little bit of an ordeal, but only because my Kitchenaid stalled on me while I was making the fondant!  It's not something that should happen with a stand mixer, but mine has always been a little bit wonky.  Which is sad, since I really like it otherwise.
I had to finish kneading the fondant by hand, which wasn't my favorite.  Since my mixer was overheated and I had scheduled myself so tightly on party prep, I had my husband pick up a giant tub of decorating icing from the store.  I usually make my own frosting for my cakes, but given the situation this was a great alternative.  The frosting was surprisingly tasty and creamy, and lots of people asked about it.  I piped it on as the polka dots on the green fondant ribbons and as the nest for the green fondant bird on top.

For support, I used bamboo skewers in the bottom layer.  I didn't do cardboard under the top layer, since it was only 6" rounds, but it did sink about a half an inch.  Next time, I will do both bamboo and cardboard for extra support.  I used this recipe for a beefed-up chocolate cake from a mix, and it was a huge hit as well.  The only thing that I did differently was to leave out the chocolate chips, since this cake was for little kids.  This recipe is a real keeper, though, and next time I will add the choco chips.  With the leftover batter, I also made a bunch of cupcakes, since I just can't help myself.
I made the cupcake toppers with the print and cut feature on my Silhouette.  I love that I can create my own design, print it out, and then cut the printed page.  And no, I don't get anything for saying that I love it (although I wouldn't turn it down. . .).  I ordered the cupcake liners, thinking they were greaseproof.  They were definitely not, but I just popped another one over them and they still looked super cute.


7.20.2011

Surf and Sky: Beach Mini Cake

I taught a beginner's fondant class for my Domestic Science Club gals last night.  We did three-tiered mini cakes.  (To make four mini cakes out of a 9"x12" cake, cut the cake into two layers, then six squares.)  Surf and sky is the design that I came up with for my cake.  I was originally going to cover the cake in yellow for a beach instead of green, but I'm glad I didn't so I could use the yellow for the sun on top.  I used a scalloped circle cookie cutter for the top, then I cut the rest out by hand with a knife.  This simple design is perfect for a beach- or summer-themed party.

Click through to this post for my marshmallow fondant and buttercream frosting recipes. 
Linked up:
Visit thecsiproject.com

4.14.2011

Marshmallow Fondant and White Butter Cream Frosting

Last weekend I helped my friend Shauna make this rubber ducky cake for a boy baby shower.  It was my best one yet!  I didn't have any problems with the fondant cracking or anything.  The only thing I changed in my recipes was to make the butter cream frosting a little thinner, and to do a half batch of fondant.  The half batch was just so it would fit in my mixer better, and so I could do the different colors with the mixer, rather than by hand.

White Butter Cream Frosting
(adapted from Lion House Weddings)

2/3 cup plus 1 Tablespoon water
4 tablespoons meringue powder
12 cups powdered sugar
¾ tsp. salt
1 tsp. clear vanilla
1 tsp. almond flavoring
1 ¼ cups shortening

Combine water and meringue powder, whip at high speed till peaks form. Add 4 cups of the powdered sugar and beat on low speed until well incorporated. Add salt and flavorings; beat slightly. Alternately add shortening and remaining powdered sugar. Beat on low speed until smooth. Makes 7 1/2 cups frosting. (*I added more water at the end until the frosting was a smoother consistency.)

Marshmallow Fondant (Half Batch)
(I got this recipe from my aunt Sharon)

1/8 cup vegetable shortening (Crisco)
1/2 pound of white mini marshmallows (good quality)
1/2 tsp. clear vanilla flavor
1/2 tsp. butter flavor
1 tablespoon water
1 pound powdered sugar

Grease the inside of a large microwavable bowl with shortening. Be careful, the melted marshmallows can get very hot.

Put marshmallows, flavorings, and water into the bowl. Microwave on high for 60 seconds.  If marshmallows are completely melted, you’re ready to move on. If not, stir and return them back into the microwave for 30-second intervals—stirring after each—until the marshmallows are completely melted.

Put powdered sugar into a large mixing bowl. Fit stand mixer with dough hook. (If not using a stand mixer, use a wooden spoon).

Add melted marshmallow mixture to powdered sugar. This is where I also add any coloring that I want. (Hint: a half batch is the perfect size for covering a two-layer nine inch cake.)  Process at low speed until well incorporated, then turn speed up slightly and allow dough hook to “knead” mixture until sugar is fully blended into the liquid.
For the rubber ducky cake, we did one half-batch of leaf green (Wilton gel coloring) and one half-batch of sky blue.  Easy peasy!  This fondant recipe is the one used for my wedding cake, and it is my favorite.  The marshmallows make it actually taste like food.
Once the cake was frosted with buttercream, we covered the whole thing with a sheet of blue fondant, then added the green stripes and all the little bubbles.  The rubber ducky was a real one, so that made things easier.  All told, this cake took the two of us about three hours to make the frosting and fondant and decorate it.  Photos were taken by Shauna Spencer.

2.14.2011

Owl Birthday Cake

We had my daughter's second birthday party yesterday, along with my baby daughter's blessing.  I made this owl cake in honor of the occasion.  It was my second fondant cake, and my first time making my own fondant!  It turned out so much better than the store-bought variety.  Here's the branch detail on the sides: 
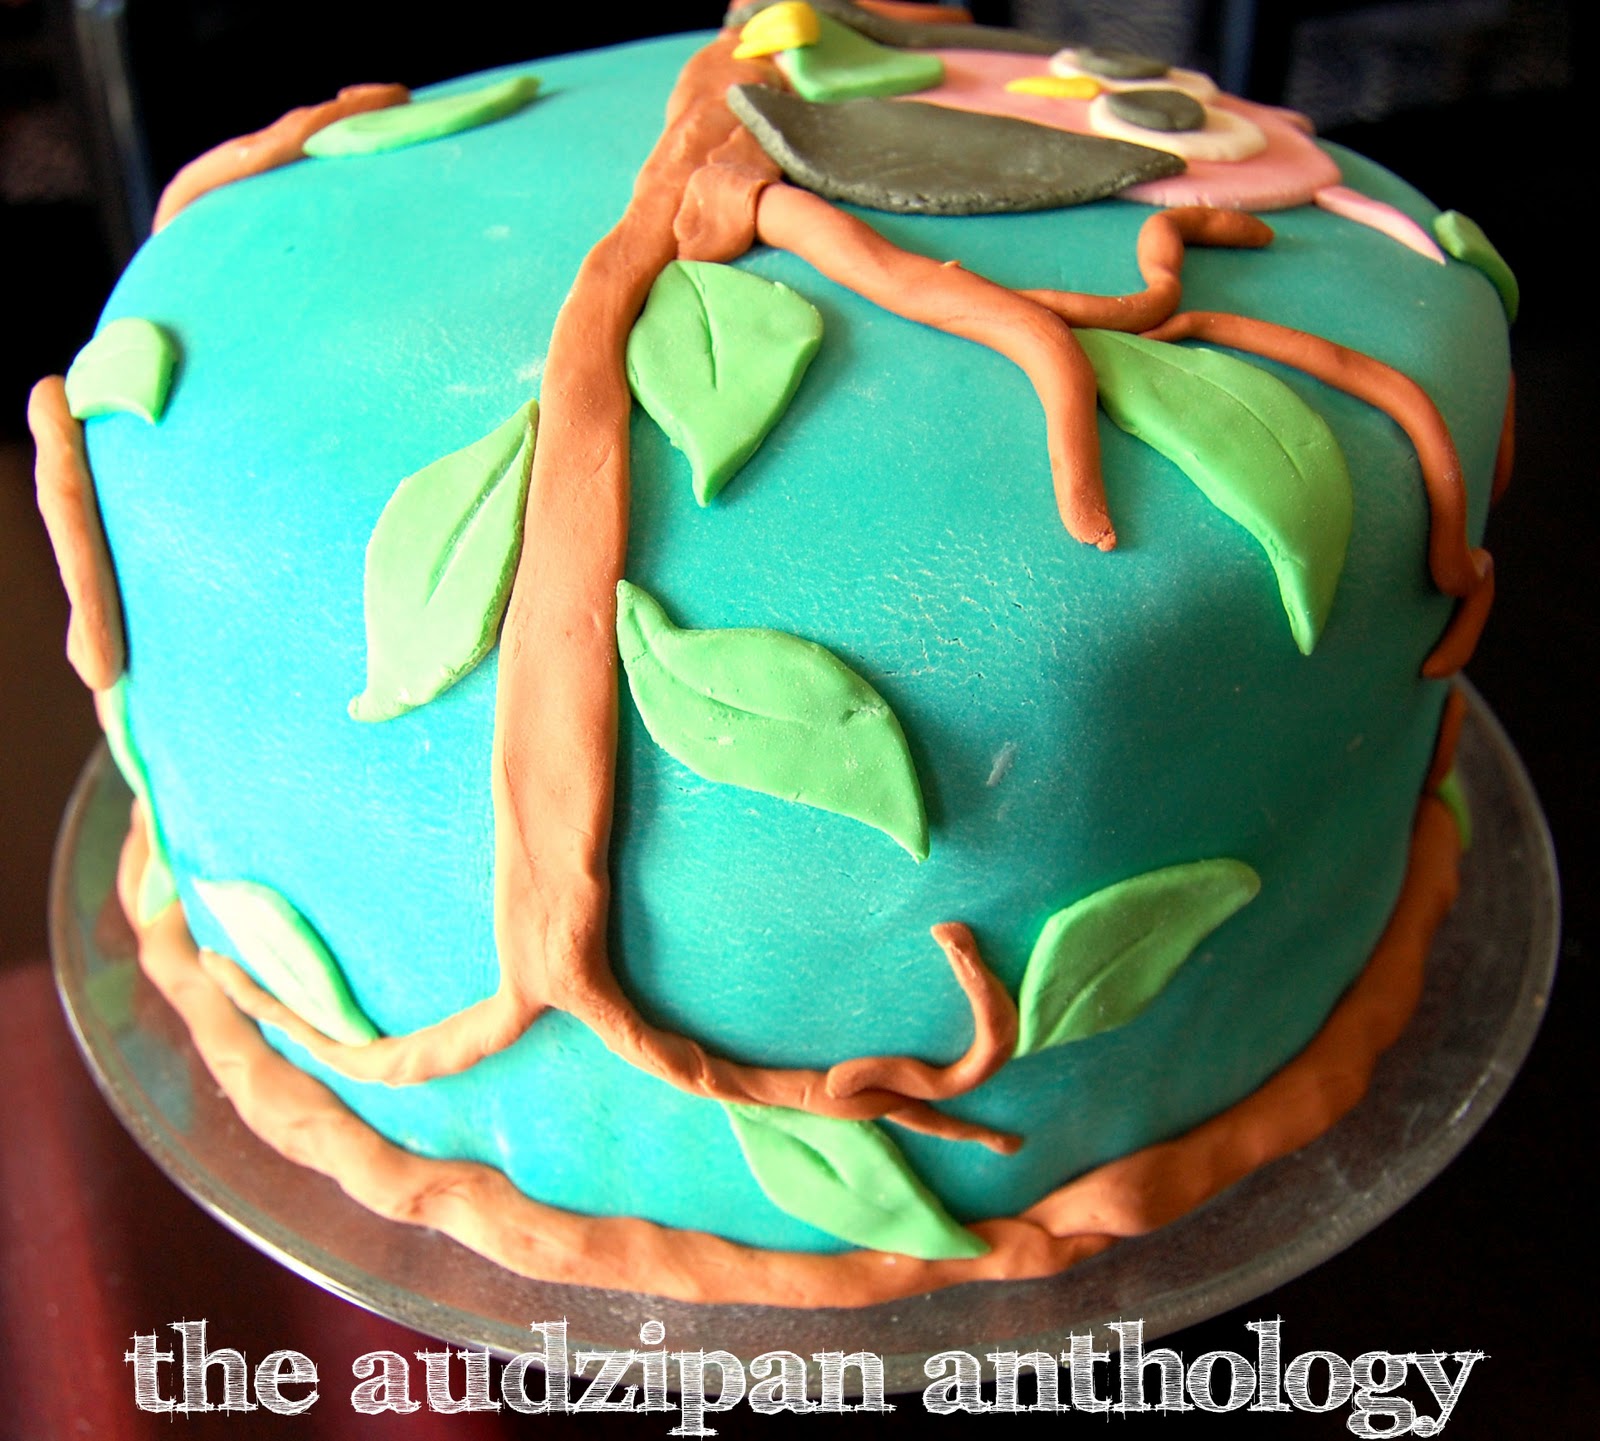

For the branch detail, I rolled the fondant into long snakes.  For the leaves and the owl, I rolled the fondant flat, then cut out the shapes with a paring knife.  The inside of the cake was four layers of funfetti cake with a pastry cream filling.
I also used bamboo skewers to stabilize the cake.  I don't know if I needed them or not, but it made me feel better about it.  Here's the birthday girl getting ready to blow out the candles:
 I had so much fun making this cake!  For the party, I also made, in my opinion, my best cupcakes to date.  Those will be getting their own post later this week.
 Happy Valentine's Day, everyone!

Linked up: Someday Crafts 
Show and Tell Green
Join  us Saturdays at tatertotsandjello.com for the weekend wrap 
 up           party!