Showing posts with label home decor. Show all posts

9.27.2012

What Have I Been Up To?

What have I been up to?  It's been a while since I finished a project start to finish, but rest assured the wheels have been turning over here.  Progress on finishing our basement is slow but steady, one of the results of doing nearly everything yourselves.  At this point, we are finished framing and ready to start the electrical and plumbing.  This does eat up a lot of our spare time (ha! what's that?), but I have been able to sneak in a little side home improvement project upstairs.  Remember this bathroom?
This is the main bathroom of our house.   It's right by the kids' bedrooms, but it is also right off the front room area, so it's the one that gets the most use.  Right now, I wouldn't say that this room is complete by any means, but we have made some real progress.  Ready to see?
Yep, we painted!  And did board and batten!  Well, you know, faux board and batten.  It was an easy, yet time-consuming and detail-oriented project, but this was a much needed transformation for this room.  It just had no heart, ya know?
We still need to frame that mirror, hang some hooks, and get some new decor going on in there.  The hair clip tree and hair clip frame, both fun and easy DIY tutorials if you need the storage, are both things I would like to hang onto in some form or another.

As far as decor goes, I'd like to add some river rock grey or toned-down cool hues to the room.  There isn't a defined theme for the room, but I'd like to have a New England lake house feel going on.  I have also considered spray painting some or all of the metal hardware in the room with oil rubbed bronze spray paint.  I'm not sure how those two ideas go together, though, so we'll see how this all plays out.  The shower curtain will probably have to go as well, although it still kind of matches.

What do you think?  Any ideas?  I'm glad to be back at blogging and excited to share some more fun things in the near future.

4.17.2012

Important Dates Artwork

As part of my master bedroom decor, I whipped up this easy poster print.  The idea comes from A Steed's Life, but as usual I have tweaked it to my liking.  All I did was type up our family's favorite dates in Photoshop, get a 16"x20" poster printed at Walmart, and pop it in a barnwood frame.
Done!  I love using poster prints because you can get a pretty huge print for pretty cheap.  This size was only about $12.  The font used for this is a free font named Modern No. 20.  I love the personal touch this gives our room.

4.06.2012

DIY Looking Glass Spray Paint Mirror

Our master bedroom decor takes one more step toward being complete.  A couple of months ago, I decided that I wanted to get a big round mirror or something new for above our new farmhouse headboard, besides the faux weathered metal letters.  I was ready for something besides the wrought iron fence piece, so I started to look into circular mirrors.  Well, long story short, they are expensive, and we were apprehensive about putting real glass above our sleeping heads.  We had the round wooden frame, from a broken Pottery Barn clock that I, unsuccessfully, tried to repair.  The mirror is actually clear acrylic plastic, bought in a sheet from the Home Depot, and spray painted with Krylon's Looking Glass spray paint.
Here's the process:
-Cut the plastic into a circle on a scroll saw.  I don't recommend cutting this by hand with a hacksaw, because the plastic is quite brittle and will snap easily.  Learn from my experience on that one.  We had to borrow the saw from a friend.
-Spray paint one side of the plastic with the Looking Glass paint, making sure to get complete coverage.  This is actually the back side of the mirror.
-Caulk the plastic into the frame so that the painted side will face the wall when hung.  Let it dry, and hang it on the wall.  That's it.
I love the smoky look the mirror has.  It feels like you are looking into a dream world.  Much more interesting than a plain old mirror!  I wasn't sure if the spray paint would work on plastic, since it only talks about painting glass, but I think as long as what you are painting is clear, it works just fine.
Linked up: Sugar Bee Crafts

3.13.2012

Faux Weathered Metal Letters

As part of my master bedroom revival, I revamped my little A and C letters.  Here's what they looked like before:
I had painted the sides black and decoupaged cute black and white scrapbook paper on the front.  It was cute, but we were overdue on an update.  I was able to get most of the paper off, but some of the paper didn't come off.  Due to the nature of the letters, I could have just flipped them around and painted them.  Since I would be able to flip them over if I didn't like it, I decided to try an experiment and see if I liked it.  (Story of my life.)
I sanded the rest of the paper off with low grit sandpaper (very coarse).  I sanded in the direction of the lines, meaning I sanded the direction that I would write the letter.
After I sanded the front of the letters, all I had to do was hit them with a few coats of Rust-Oleum's Hammered Metal spray paint in silver.  So easy!  I am in the process of hanging these with a new focal piece above the headboard, plus I have a couple of new spring projects to work on.  I also finished a couple more decorative pieces for the master bedroom that I am really excited about.
Linked up: The CSI Project

2.22.2012

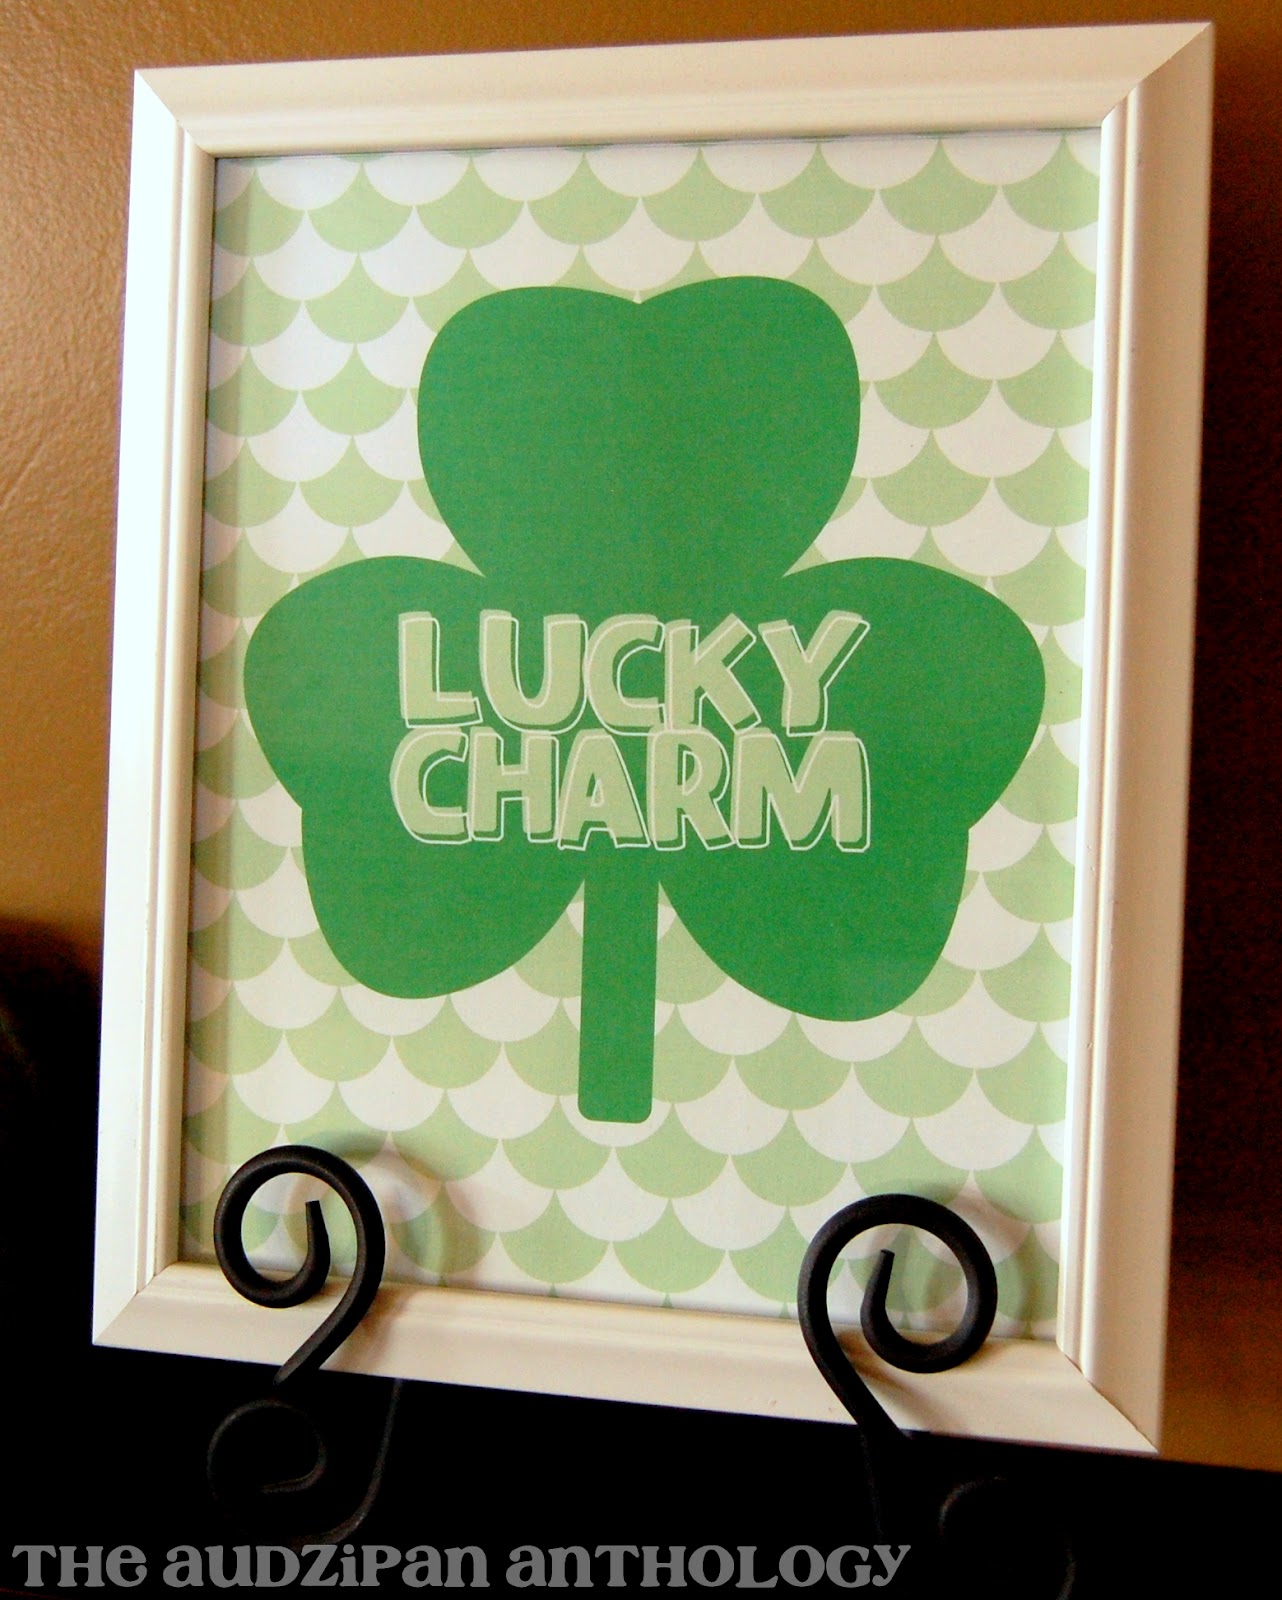
St. Patrick's Day Lucky Charm Printable

Pin It  
It's time again for the free printable of the month!  Everyone needs a lucky charm for St. Patrick's Day, and it doesn't get easier than this.  With the scalloped background, this one looks a lot better in a frame.  You can either get a document frame, or just grab an 8"x10" frame and trim the paper down, which is what I did.  I took 1/4" off each side and 1/2" off both the top and bottom to fit it in the frame.
As always, my printables are free, but please give credit where credit is due.  To download the printable, click on the image.  It will take you to a new page, where you can right-click and save the photo.  Then, just print the image the original size, and it will be ready for use.  You can frame it, put it in a tabletop easel, hang with clothespins, or whatever else you can come up with!  Any questions or requests?  Send me an email or just leave a comment.
I'm Lovin' It at TidyMom

10.27.2011

Birch Trees Art

I finished painting these birch tree canvases for our master bathroom a couple of weeks ago.  It took a little bit longer than I expected, but the extra work was definitely worth the work to get the look I was going for.  Originally, I was going to do these two-toned, but it never looked quite right.  Once I changed the stripes on the trees to black, added slight shadows, and washed the grey with a slightly darker grey, things really looked better!  Here's a close-up:
I used a white paint in gloss and the other colors in matte to give another dimension to the pieces, but you'll have to wait to see that part of it until I finish up the rest of the master bathroom.  Since these are hung in our bathroom, I sprayed the canvases with two coats of matte artwork sealer to protect them from condensation and splashing water. 

Once we finish caulking the new trim, I will be able to get home tour photos of the master bathroom!  Also, the piano bench re-upholstery project and painting the hallway to the garage purple are finished, both with amazing results.  We also found some great Craftsman style knobs on clearance at Lowe's for our kitchen cabinets and installed them.  We had a very productive weekend last week, and I can't wait to show you all of our recently finished projects.

10.15.2010

Pennant Wall Art

We hung the pennant wall art that I made for the baby's room, and it looks fab!  
The stripes are painted, the flags are scrapbook paper, and the strings are ribbons.  The paper gives it a lot of dimension, and the ribbon adds some fun texture.  The room feels a lot more complete on that side as well.

Bathroom Shelf

Welcome to our poor, neglected main bathroom.  Of all the rooms in our house, the main bathroom, master bathroom, hallways, and laundry room are all still basically untouched decor-wise since we moved in a little over a year ago.  No paint, no theme, no nothin'.  

All we did was hang that little wall shelf over the toilet (the other jungle decor is a lucky hand-me-down from my mom), and things look a lot more lived-in already.

Here's to finishing another project that I have had on my list for a while.
  • Make fabric boxes for the new changing table (still looking for a great tutorial, will let you know when I find one!)
  • Finish fall wreath (work in progress!)
  • Paint birdcage cream or light yellow
  • Find a buffet to paint for the dining area
  • Get chairs for the front porch
  • Get potted plants for the driveway
  • Build shelves on either side of the washer and dryer
  • Take door off coat closet, paint, and put cubbies inside
  • New couch pillows
  • Install wall shelf in main bathroom
  • Refinish piano
  • Make some green frames to match green stained table
  • Fix leg on green table
  • Get or build a picnic table for the backyard
  • Sew kitchen curtain (work in progress!)
  • Sew changing pad covers
  • Make flower hairclips
  • Turn craft room into nursery
  • Laundry room makeover

3.08.2010

Hanging Flower Balls

Ok, I saw this great tutorial for Hanging Flower Balls (scroll down; it's the last half of the post) over at Tatertots and Jello and just knew I had to put it up here.  It is originally from Shelley at House of Smith's.

The flowers are made from crepe paper, but I was thinking that you could also do them out of fabric, like these ones at Little Birdie Secrets:
I think these balls would make great decor for a kid's room, either hanging or sitting in a bowl. You could also do earth tone colors and use them for year round decor in any room! I am excited to try making these flowers.

I am experimenting making hair clips for my daughter. If I get it all figured out, I will post the tutorial for next week. So far, the project involves fabric-covered buttons, snap clips, felt, and a glue gun.

Also, check in tomorrow to see the completed paint in my kitchen! Hint: It looks fabulous.

3.02.2010

Creating a Beautiful Kitchen, Part Two


Here's the update on our painting so far. We have coated the dining area twice, but there are still a few spots that need another coat. The pantry door area has one coat, and we still need to do around the cabinets and behind the stove and fridge. I love how it is looking!

All of the photos of accessories that I posted last week are clickable to get to where I found them. So just click on the photo, and it will take you there!

No, I don't actually own any of those items, but I am hoping to get the terrarium or one very similar for Mother's Day.

Hoping, but mostly hinting. Lots of hinting.

2.10.2010

Kitchen Repaint and Hallway Coat Rack

Today's topic is home decor. Specifically, my home's decor. We recently moved into our house, and it was brand new to begin with, even though we didn't build it. Over the months, we have painted a couple of rooms, finished part of the basement, and worked at getting a sprinkler system and grass in the yard.

We recently finished a project that I have wanted to do for a couple of months. In the hallway from the kitchen to the garage, we put a coat rack along the wall. It looks so wonderful, and it really is quite useful. Here is a photo:
I can't take all the credit, though. It was my neighbor Jennifer's idea.

I am to the point that I want to paint my kitchen, but I can't decide what color. Blue? Green? Something else entirely? I feel kind of burned out on picking paint colors. Here's what it looks like (ignore the inspector guy, and imagine our stainless steel fridge):
What do you think?